

Summary
This guide is for beginners, intermediates who know the basics of web applications, web servers & digital advertising.
Google Tag Manager helps you to effortlessly implement all your existing marketing tags without cluttering it up in the source code of the website. This guide will help you understand how you can perform an effortless migration of the hardcoded Google Analytics implementation from the website into Google Tag Manager.
Intro of Google Tag Manager
Google Tag Manager is a free and user-friendly tool which helps you implement all your marketing tags on the website (or mobile application) without explicitly having them to be placed on the source code of the website. You can easily manage adding, editing or deleting your tags from the website using Google Tag Manager.
You can refer to this link here for more details on Google Tag Manager.
Existing Google Analytics Implementation
The Google Analytics code has evolved overtime in terms of faster loading on the website and better data collection accuracy. Below is a quick intro of each of the evolution stages.
Back in 2005 when Google acquired urchin Analytics it did not explicitly make any changes in the code snippet. This was recommended to be placed immediately before the closing of the tag of the website.
<script src=”http://www.google-analytics.com/urchin.js” type=”text/javascript”>
</script>
<script type=”text/javascript”>
_uacct=”UA-XXXXXX-1″;
_userv=2;
urchinTracker();
</script>
Then in 2007, came the Google Analytics synchronous code which was again recommended to be placed immediately before the closing of the tag of the website. It included the ga.js and Pagetracker component in it.
<script type = “text/javascript”>
var gaJsHost = ((“https:” == document.location.protocol) ? “https://ssl.” : “https://www.”);
document.write(unescape(“%3Cscript src=’” + gaJsHost + “google-analytics.com/ga.js’ type=’text/javascript’%3E%3C/script%3E”));
</script>
<script type=”text/javascript”>
try
var pageTracker = _gat._getTracker(“UA-XXXXX-1”);
pageTracker._trackPageview();
} catch(err) {}</script>
Both the above codes get executed only after the entire page gets loaded and google analytics then records a visitor on the interface.
Post this in 2009, Google introduced an asynchronous code which was recommended to be placed just before the closing of the tag of the website. This was as opposed to the previous versions which were placed just before the closing of the tag. This improvisation caused the GA tag to get executed simultaneously as the webpage loaded making it load faster and tracking data more accurately. It also included the ‘gaq.push’ component in it.
<script type=”text/javascript”>
var _gaq = _gaq || [];
_gaq.push([‘_setAccount’, ‘UA-XXXXXXXX-X’]);
_gaq.push([‘_trackPageview’]);
(function() {
var ga = document.createElement(‘script’); ga.type = ‘text/javascript’; ga.async = true;
ga.src = (‘https:’ == document.location.protocol ? ‘https://ssl’ : ‘https://www’) +
‘.google-analytics.com/ga.js’;
var s = document.getElementsByTagName(‘script’)[0]; s.parentNode.insertBefore(ga, s);})();
</script>
Then came the new analytics code with improved features for re-marketing to better help targeting of Display ads, back in 2012. It now had the ‘dc.js’ component in it. The only difference between this script and the ‘ga.js’ script is the ‘function’ call.
<script type=”text/javascript”>
var _gaq = _gaq || [];
_gaq.push([‘_setAccount’, ‘UA-XXXXX-X’]);
_gaq.push([‘_trackPageview’]);
(function() {
var ga = document.createElement(‘script’); ga.type = ‘text/javascript’; ga.async = true;
ga.src = (‘https:’ == document.location.protocol ? ‘https://’ : ‘https://’) +’stats.g.doubleclick.net/dc.js’;
var s = document.getElementsByTagName(‘script’)[0]; s.parentNode.insertBefore(ga, s);
})();
</script>
The Universal analytics code was introduced in 2013 which attracted a lot of audience. It included many other additional features such as signed-in users, advanced visitor segmentations, custom dimensions, etc. This was recommended to be placed at the top of the tag.
<script>
(function(i,s,o,g,r,a,m){i[‘GoogleAnalyticsObject’]=r;i[r]=i[r]||function(){
(i[r].q=i[r].q||[]).push(arguments)},i[r].l=1*new Date();a=s.createElement(o), m=s.getElementsByTagName(o)[0];a.async=1;a.src=g;m.parentNode.insertBefore(a,m)
})(window,document,’script’,’//www.google-analytics.com/analytics.js‘,’ga’);
ga(‘create’, ‘UA-XXXX-Y’, ‘auto’);
ga(‘send’, ‘pageview’);
</script>
The latest ‘gtag.js’ library includes all the ‘analytics.js’ library features in it and additionally it is designed to simplify and streamline website tagging for all Google products. This was recommended to be placed immediately after the tag on every page of the website.
<script async src=”https://www.googletagmanager.com/gtag/js?id=UA-XXXXX-X”></script>
<script>
window.dataLayer = window.dataLayer || [];
function gtag(){dataLayer.push(arguments);}
gtag(‘js’, new Date());
gtag(‘config’, ‘UA-XXXXX-X’);
</script>
The above is the list of possible codes as per Google analytics versions that would be hardcoded on the website. Google Tag Manager has all the latest library features in its Universal Analytics Tag.
Step by Step Shift to GTM
Below is the step by step way to shift your existing hard coded implementation to Google Tag Manager. The below ways are easy to understand and implement.
Create a GTM Account
Once you have the gmail account in which you need to create the Google Tag Manager Container, click on the ‘Create Account’ Button.

- In the ‘Account Name’ field, write the name of the company. (Ex: – Logical Analyst)
- From the ‘Country’ dropdown select the country in which your company exists.
- You can tick the ‘Share data Anonymously’ radio button if you want. (This would share data to google anonymously to improve its benchmarking system).
Create a GTM Container
Here, you need to fill the information about the domain and the type of platform.

- In the ‘Container Name’ field enter the domain of your website. (Ex: – logicalanalyst.com)
- Then select the type of the platform i.e. Web in this case.
Post this you’ll need to accept the T&Cs of Google Tag Manager before going forward.

Once container setup has been done, a pop-up with the GTM script implementation guide would appear. We will discuss this in the later part of the post.
Create a Google Analytics Tag
You can now create tags in GTM to fire on respective interactions on the website. We will now create a basic google analytics tag to fire on all pages of the website.
- Click on the ‘New’ button on the top right.
- Click on the Tag Configuration and select the Universal Google Analytics Tag Type.
- Now let Track type be set to Page view. Click on the radio button to Enable Overriding settings and enter the Google Analytics Property Id in which you need to send the data.
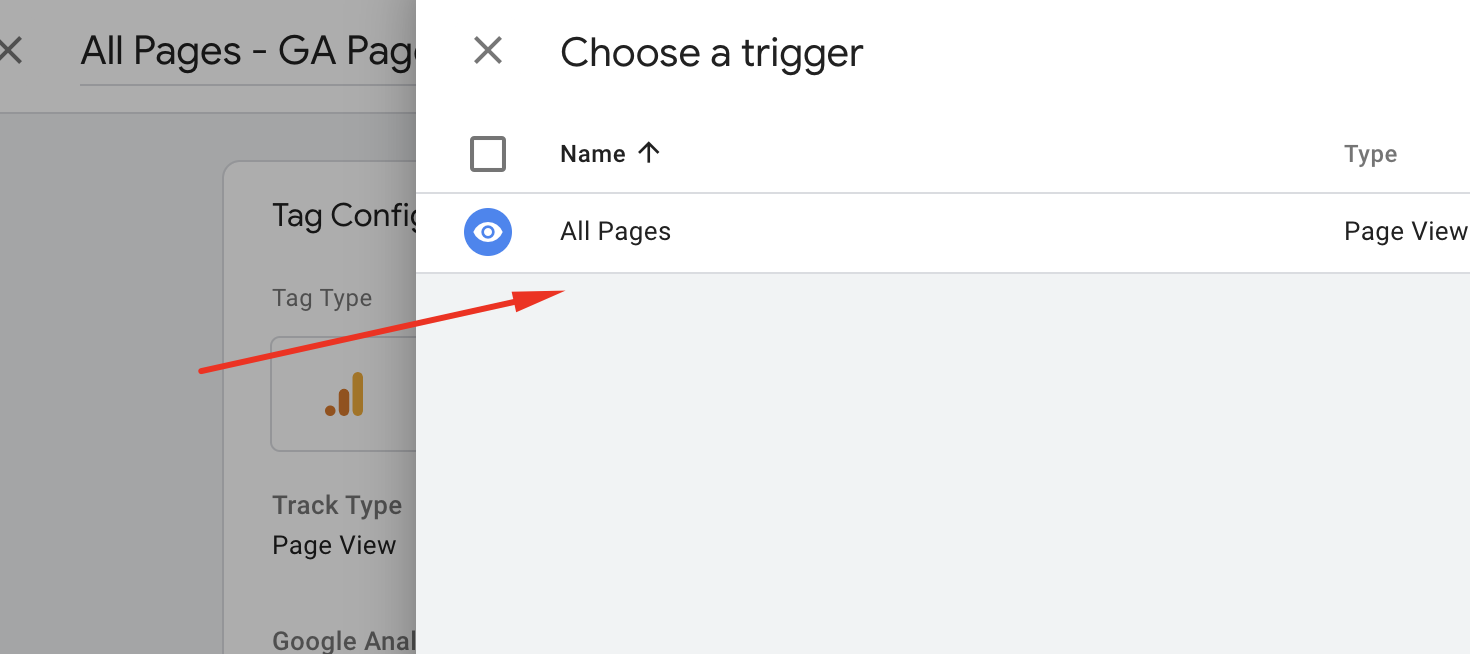
- Now you need to attach a trigger to this tag, i.e. an appropriate interaction on which you’d like this data to flow into Google Analytics. For this, click on the trigger configuration below the tag and select the All Pages trigger (this is in-built in GTM) which will fire the GA Tag on all pages wherever your GTM snippet is present.
- Now Save the Tag


Publish the GTM version
Lastly click on the Submit button to publish your changes.

Remove Hardcoded GA Tag and Place the GTM Code
Once the Google Analytics Tag setup is complete, follow the instructions to implement the GTM code snippet on all pages and simultaneously remove the hard coded GA snippets. This would save you from any form of data loss while migrating your GA tags.


Test the Google Analytics Implementation
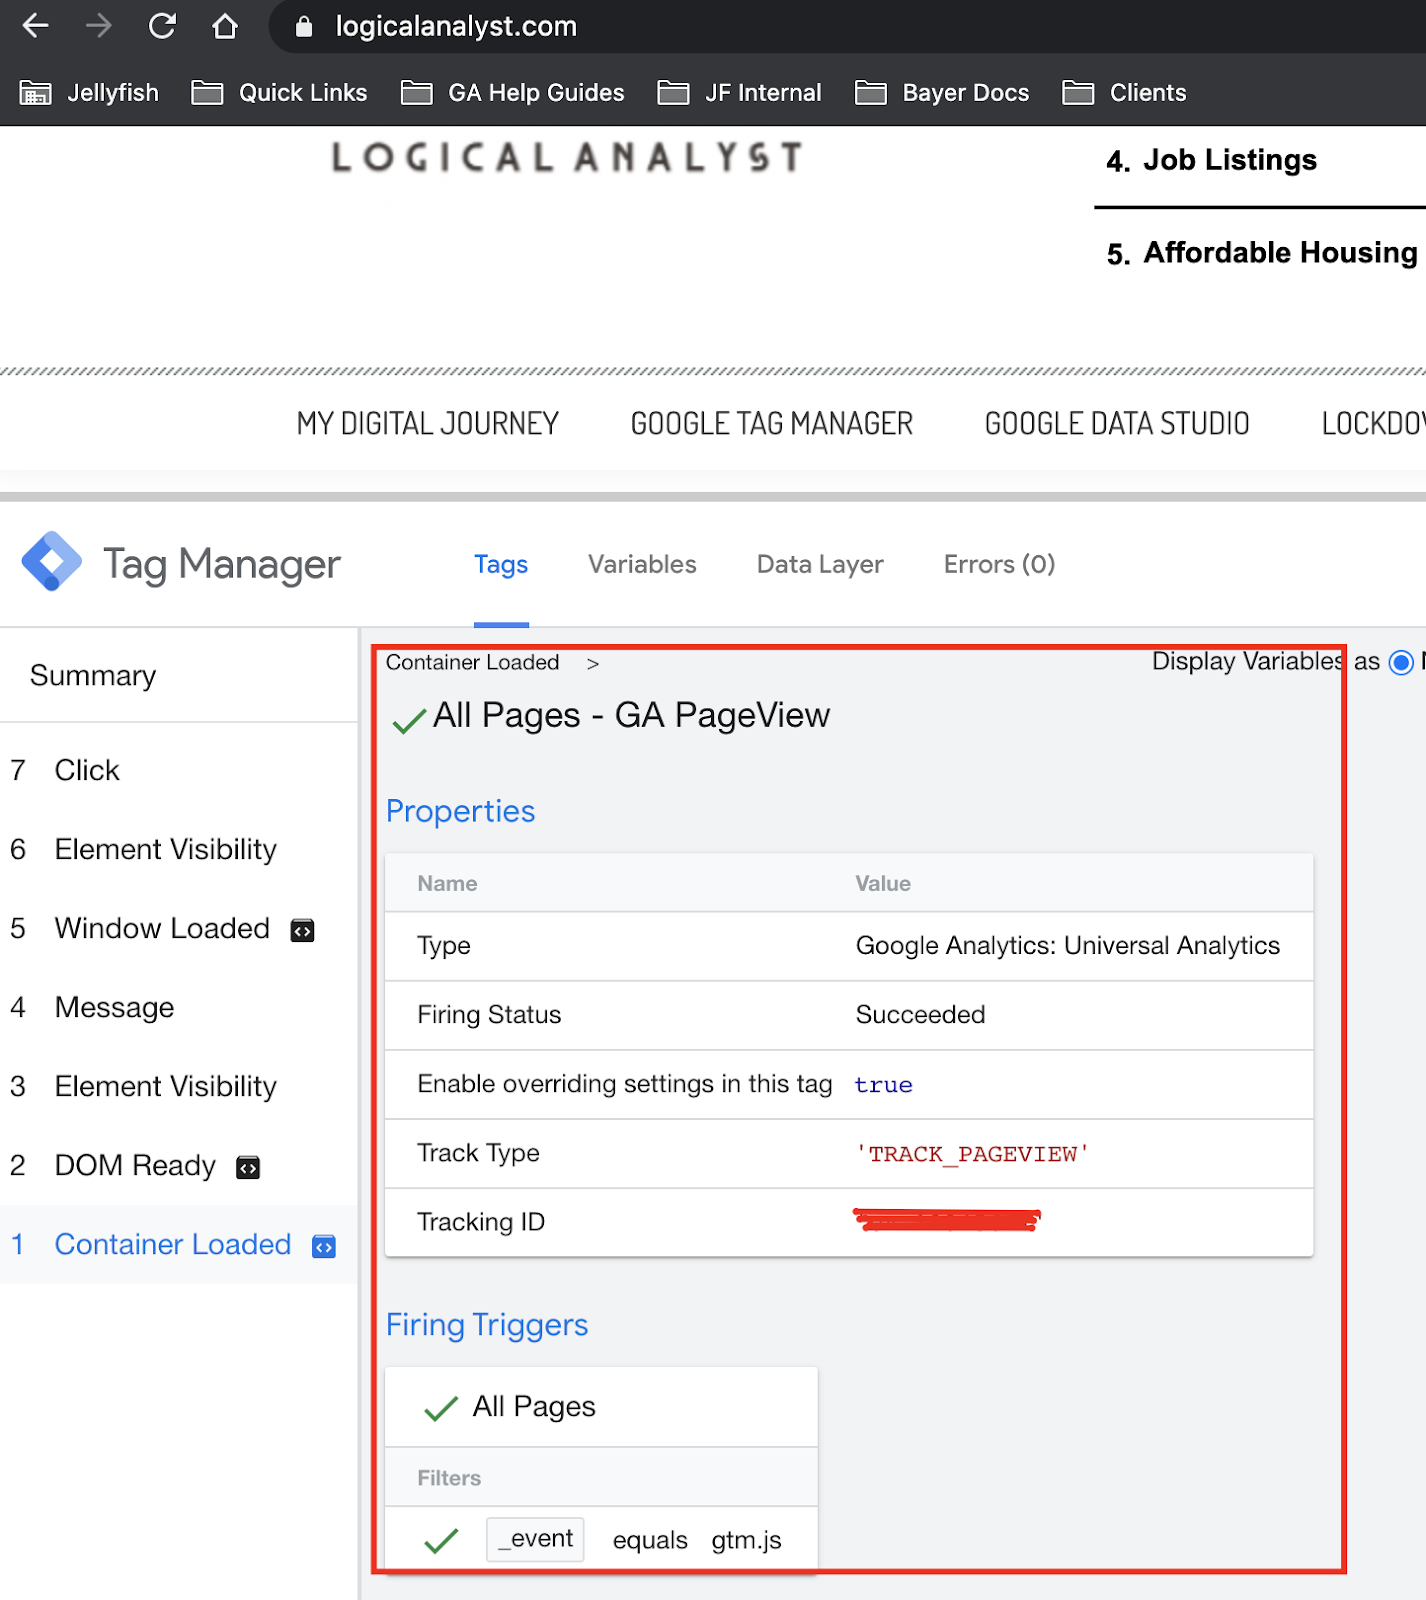
To test your implementation, click on the Preview button to open the GTM Debug window in your website. Once preview mode is on, refresh your website. This Debug window will only be visible to you and not any other user.
Once the website has been refreshed, the debug mode will appear. Click on the Container Loaded (This was previously known as Page view) section of the Debug Mode.
You can also verify this by entering utm parameters in your url and refer to the Google Analytics Real-time reports. (You can click on this link for using utm parameters correctly).
Points To Remember
- Make sure that you have removed all the hard coded Google Analytics codes from the website while implementing the GTM snippet.
- You can migrate your tags into GTM at a time period in the day when you know that the traffic on the website is the least. This will save you from losing any data.
- Make sure you publish your GTM workspace before you remove and implement the GTM snippet to avoid data loss.