

Implementing Quantcast Q-Pixel
In this article, we will have a look at how to implement Quantcast’s Q-pixel on your website for tracking activity on the website such as pageviews, click events, purchase events, lead submissions and more. You can also get access to insights about your site’s audience and campaign analytics once you implement the Q pixel on the Quantcast DSP platform.
A tag or a pixel is a piece of javascript code that loads along with the rest of the codes on the website. This javascript code is a source of connection between the website hosting server and the Quantcast server. It allows the platform to request specific information related to a website visit or an event and record it. Some of the information which the pixel is able to request when implemented on the website is page url, browser information, screen resolution, and more.
Q Pixel is made of two snippets of javascript code. A Base tag and an Event Tag.
Base Tag – The base tag is placed between the <head> and </head> tags on all the pages of the website.
Event Tag – The event tag is placed only on pages related to events that you are tracking.
We will look into the basics of the QC tag implementation from how to generate a QC pixel in your Quantcast account, deploying the base tag and how to check if your Q-pixel implementation is done correctly.
Step 1 – Generating the Q-Pixel
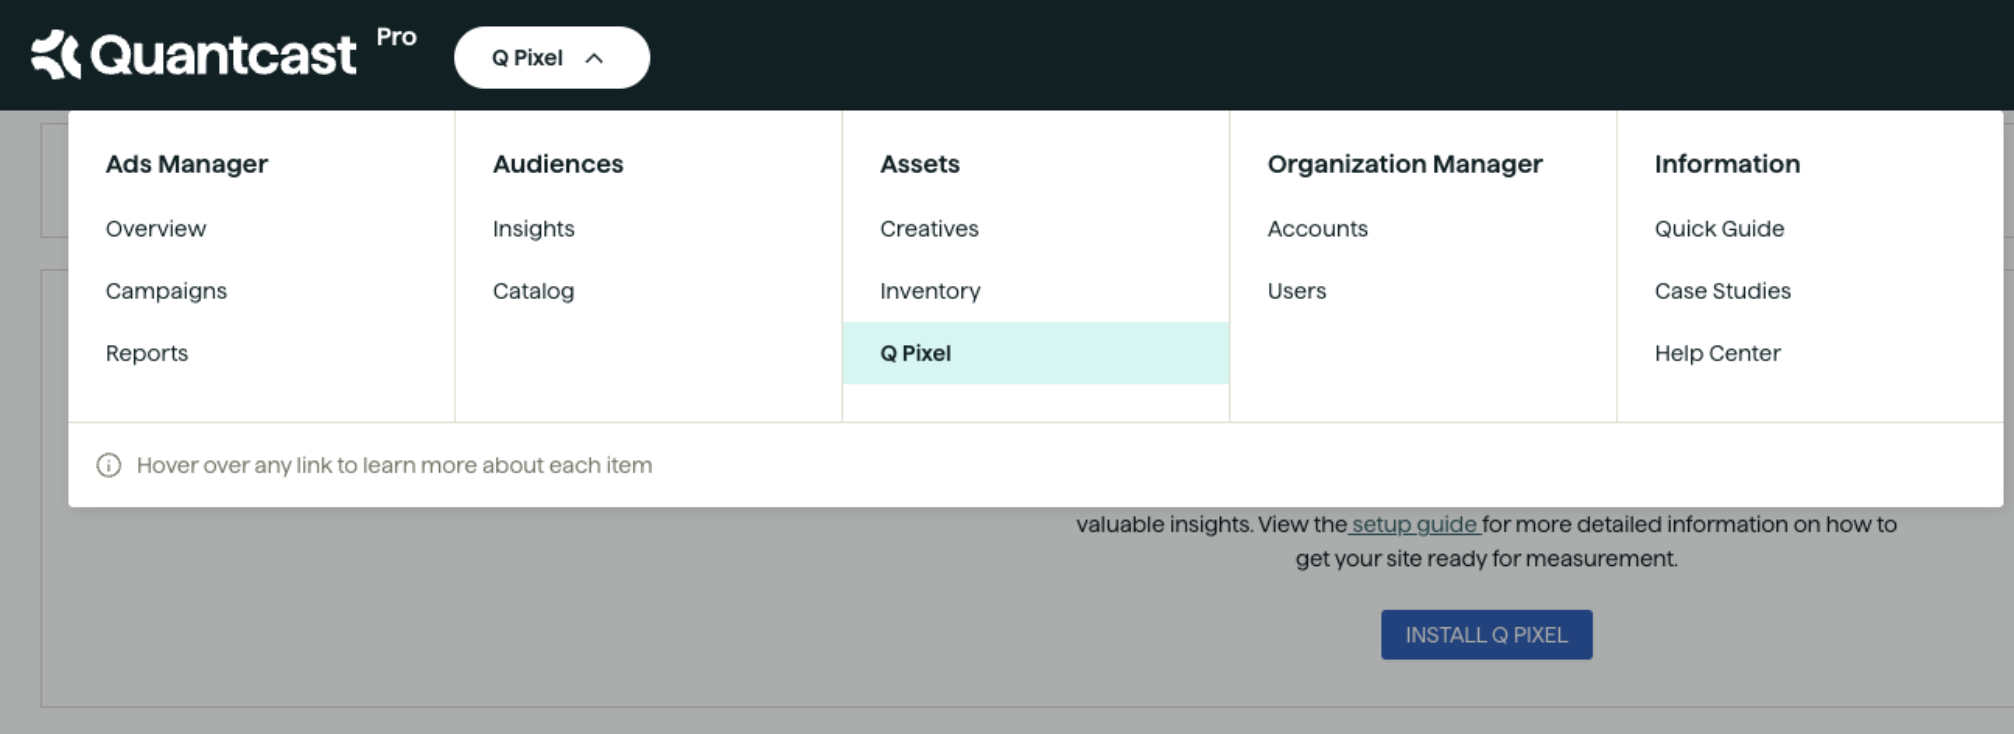
Navigate to the top right menu on your Quantcast account and go to the “Q Pixel” section of the platform.
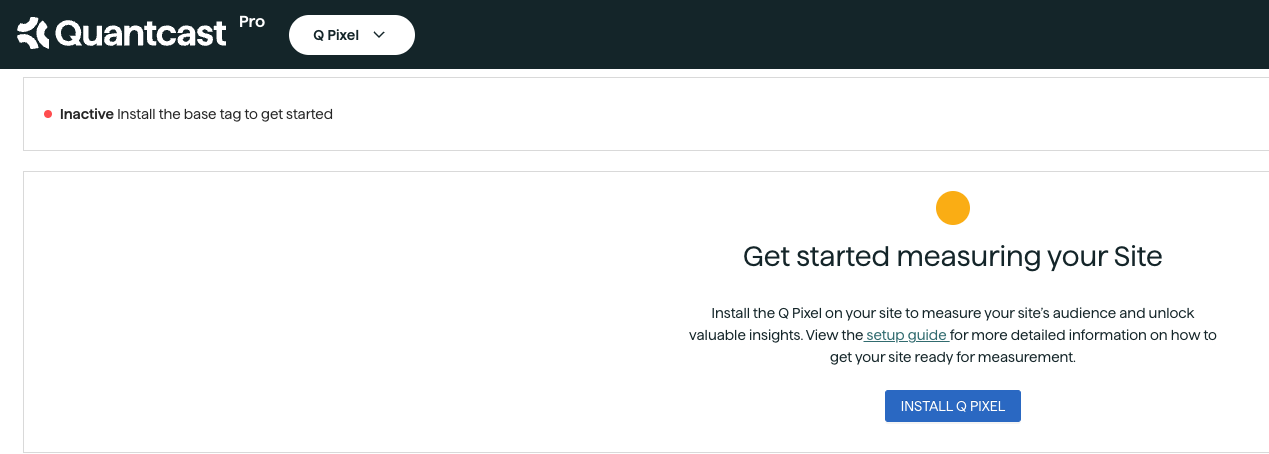
Here you will see a button at the center of the page called “Install Q-pixel”. Click on the button and the button will generate a unique javascript code along with the p-code which is the unique identifier for your account in the Quantcast database. You can also use the “Grab Pixel Code” button on the top right to get the code later after generating it.
In the below image, you can see a code which is a base tag, it means that the code should be deployed on all the pages of the website and it captures all the basic information from the website such as pageviews, browser information, device information, geo-location (complying to GDPR) and more.
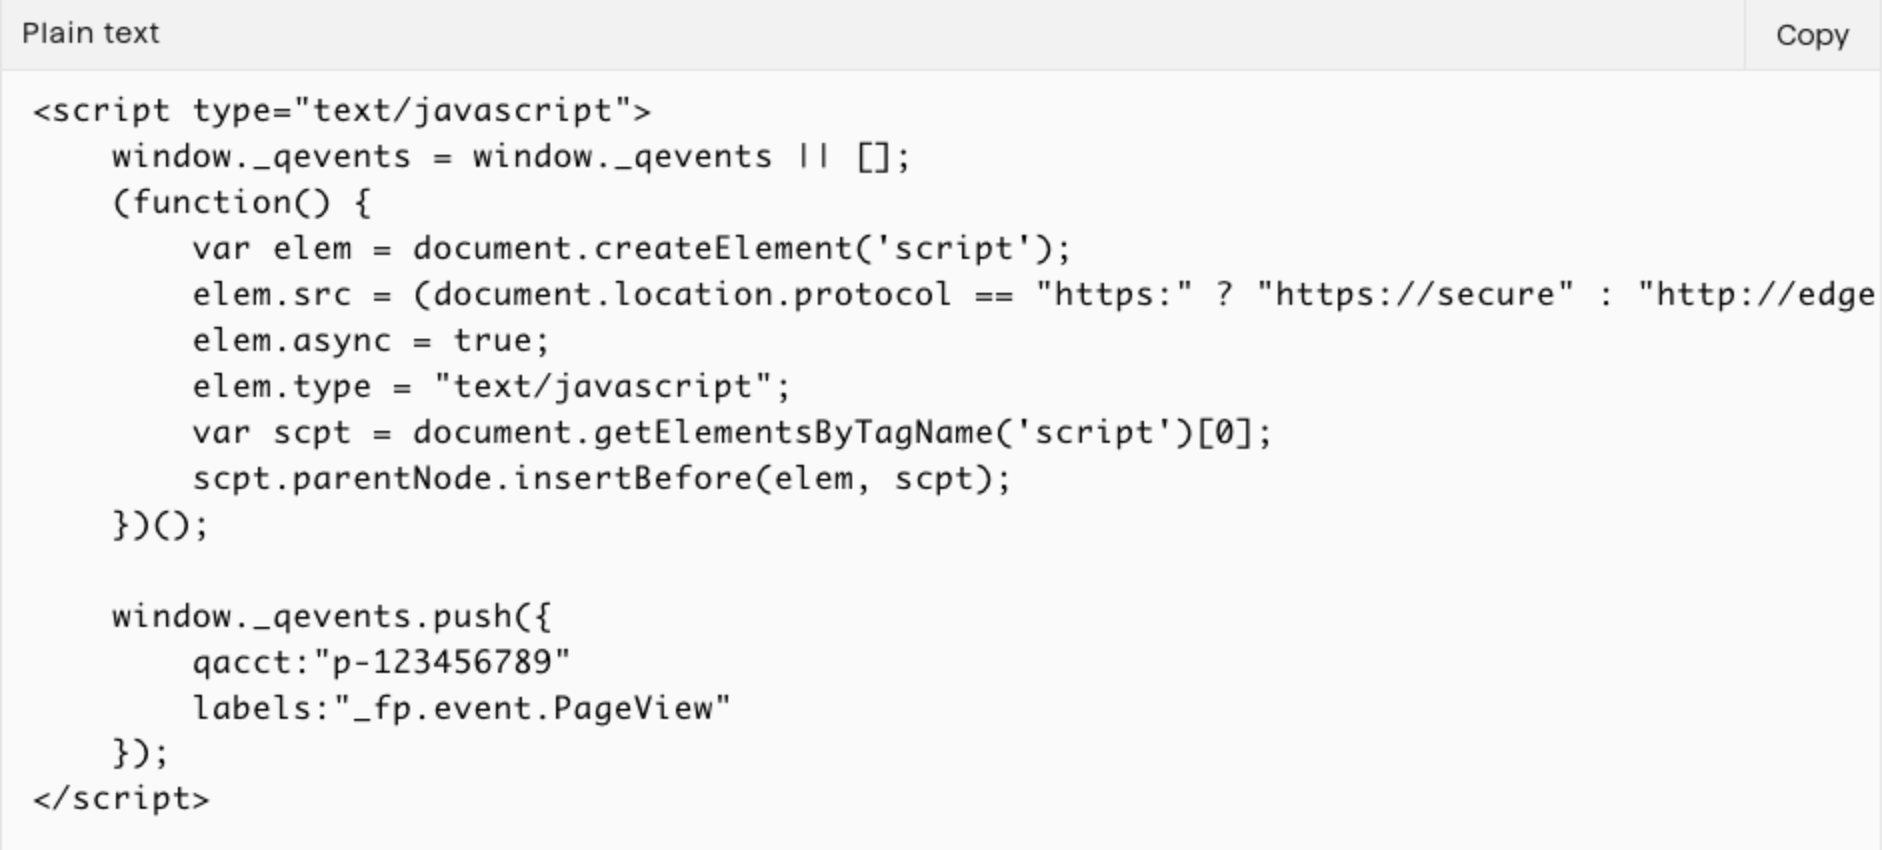
The code first loads the javascript library on the browser and then sends an event with a label “_fp.event.Pageview” this means that the code is logging a pageview.
Important note – As the quantcast pixel is used for advertising purposes it is categorized as a marketing cookie. It is important to make sure that the pixel only fires after a user has given the website consent to use the information for marketing purposes. You can use consent management platforms that can help you be complaint with the IAB Transparency and consent framework. One of the good example of a CMP which follows IAB TCF v2.2 is cookiebot.
Installing the Q-Pixel
After generating the Q-pixel code, you can either send the code to your web developer and ask them to deploy it on all pages of the website or you can use a Tag manager like Google Tag Manager and create a Custom HTML tag and fire it on all the pages of the website. You need to make sure that the code has been successfully installed on your website now. There are several ways to check the implementation of the tag.
Quantcast Tag Inspector Chrome extension –
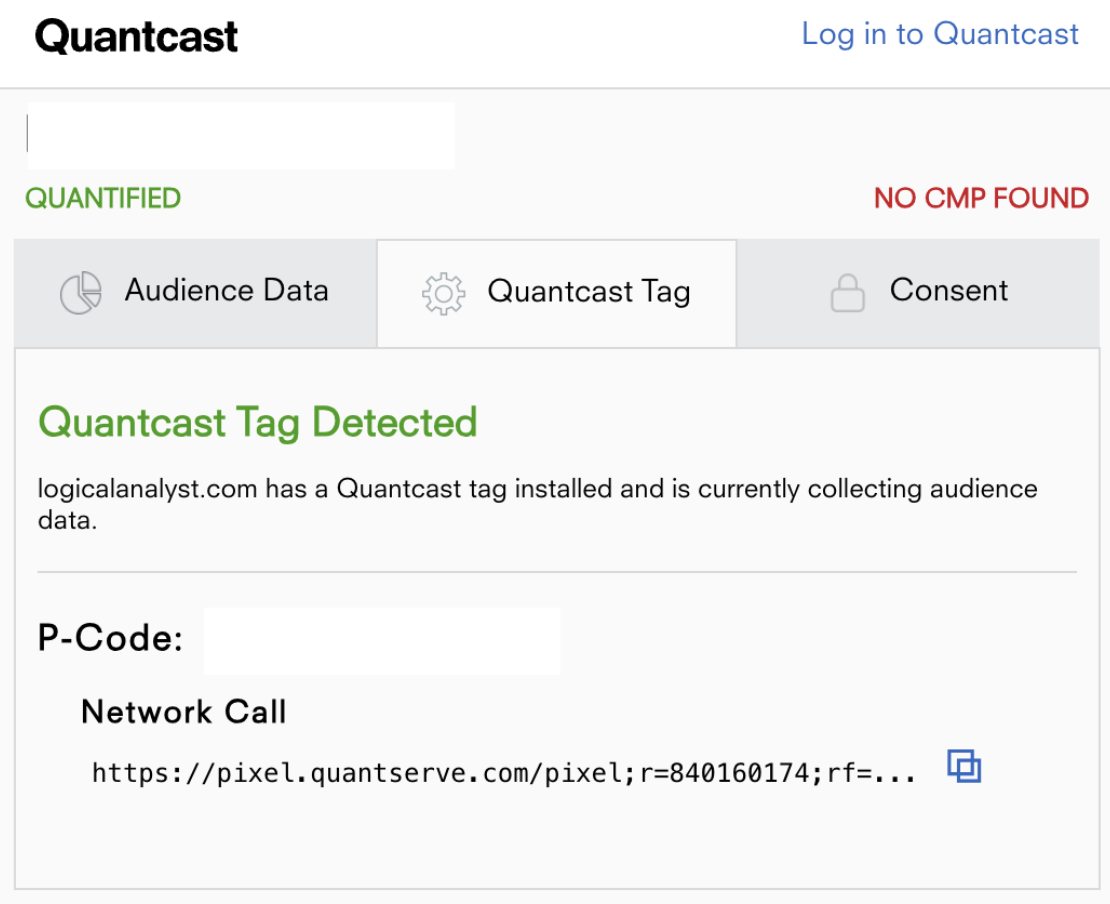
You can download the quantcast tag inspector chrome extension. Once the extension is installed, refresh the webpage and the extension should be able to identify the tag on the website and will show as “Quantcast Tag Detected” and will also show details such as the account p-code and the network call it made in the form of a URL.
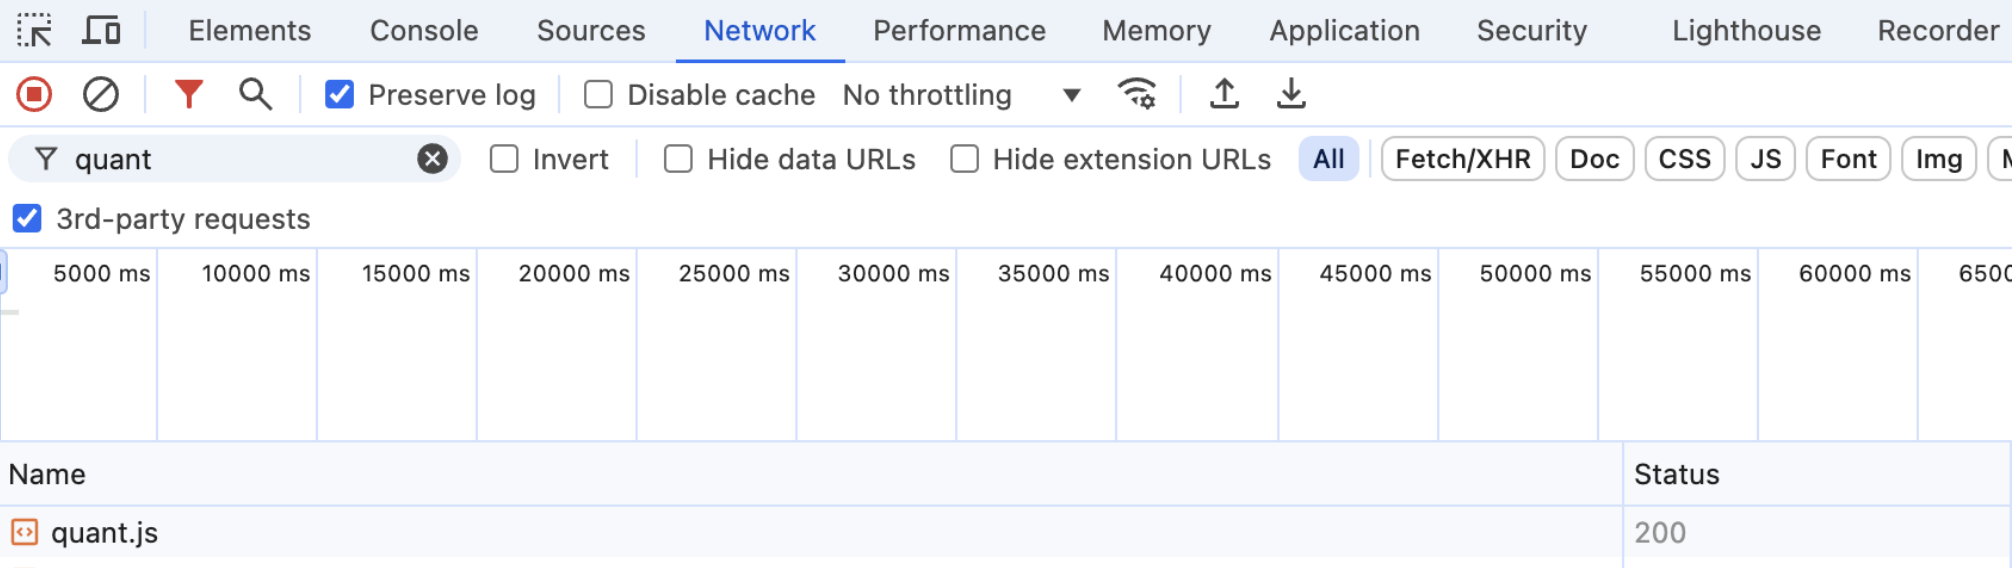
Chrome Developer Tools –
You can also open the developer tools by right clicking on the website and selecting “Inspect”. Navigate to the “network” section and search for “quant.js”. You will be able to see the logged network call the pixel has made to confirm that the pixel is firing properly. This is a more accurate way to check the tag implementation as sometimes the chrome extension might fail to work as expected and might not be able to detect the tag even after successful implementation.
Hope the article was helpful in understanding the basic of the Q-pixel and how to implement and check the implementation. In the next article, we will see how to track conversions and key actions from the website in the Q-pixel and more advanced implementation of passing back data such as revenue and order id into the Q-pixel for better optimization of your campaigns.